UseRogue Master Class
24th Jun 2026
Intro
The UseRogue platform is the most capable AI-powered business development platform on the market. With that capability comes a large number of features, tips, tricks, and tools for maximizing your use of the platform. This Master Class should serve as an intro, desk reference, and pro-tips, all rolled into one.
The flow of this class is linear, as a user would use the platform, from first startup through pro user.
Initial Startup
If you are new to UseRogue.com, getting signed up and started is simple.
Signup
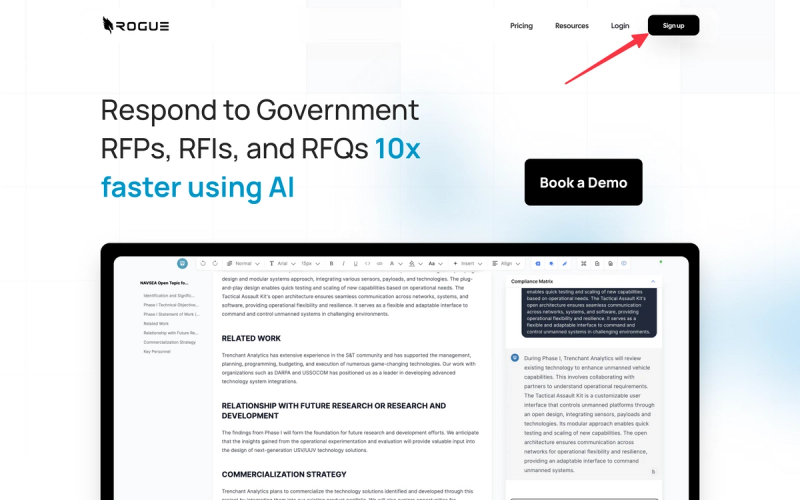
From the UseRogue.com landing page, select "sign up".
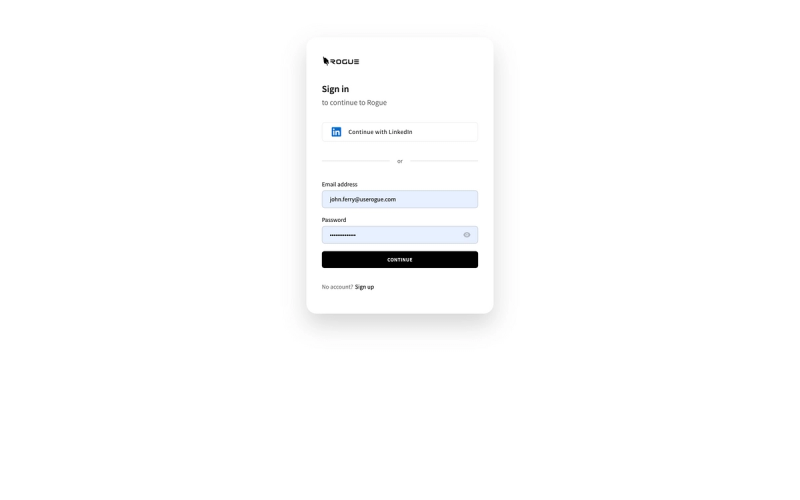
If you have an account, you can sign in using email, or with LinkedIn single sign-on.
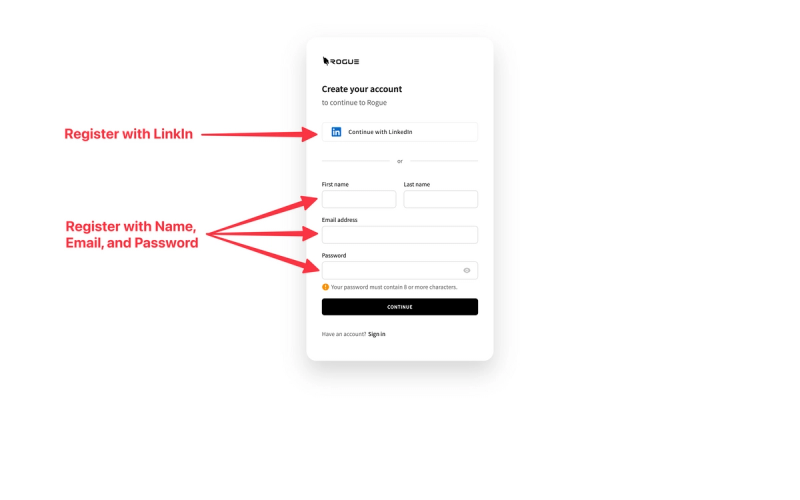
If you not yet have an account, selected the "sign up" link below the sign in menu.
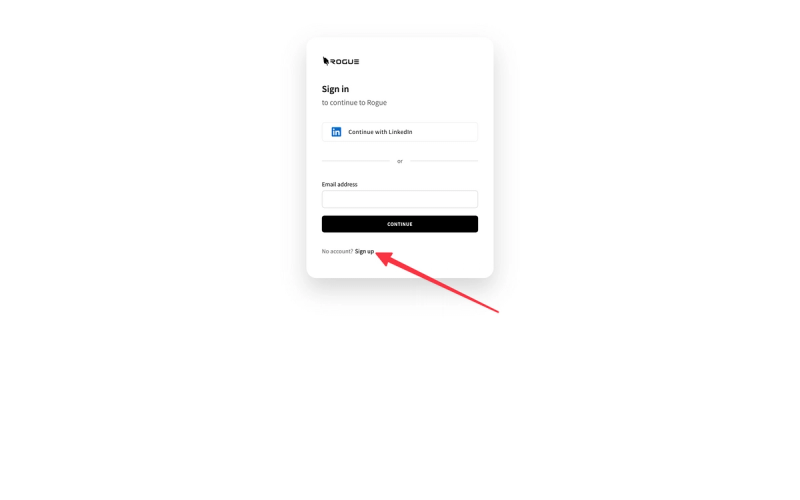
You can then register with email and password, or with LinkedIn.
Important note: if you sign up with LinkedIn, the email account associated with your LinkedIn will be associated with UseRogue.com. If your LinkedIn email is different from your corporate email then we suggest using your corporate email.
Once you sign up you will receive a payment link and an invitation to book an onboarding call. We strongly encourage you to book an onboarding call, the UseRogue platform has an extensive set of features, a 30 minute call can save you hours of learning them through exploration.
Sign In
Once you are signed up and have a paid account, signing is simple with either your username and password or your LinkedIn account.
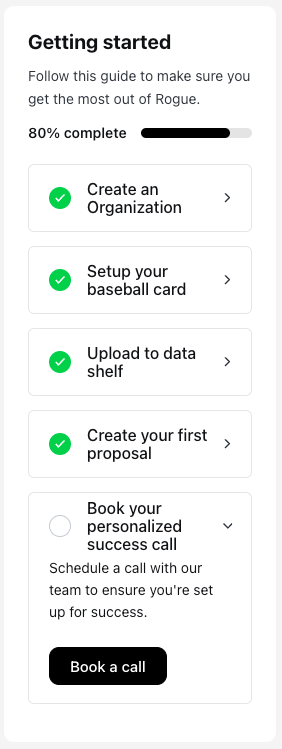
Getting Started Process
Following the Getting Started steps is very important to the proper function UseRogue.
These five steps are designed to ensure you have a good feel for the platform. It should only take you 45-60 minutes to complete steps 1-4, after which we strongly encourage you to book a follow-up call so that we can guide you through any issues you encounter. The effort of writing government proposals is so varied that we can't possibly write a guide for each edge case. But, what we 100% can do is guide you through any unique case you encounter.
Organization Setup
Your first step is to set up your organization and populate it with members.
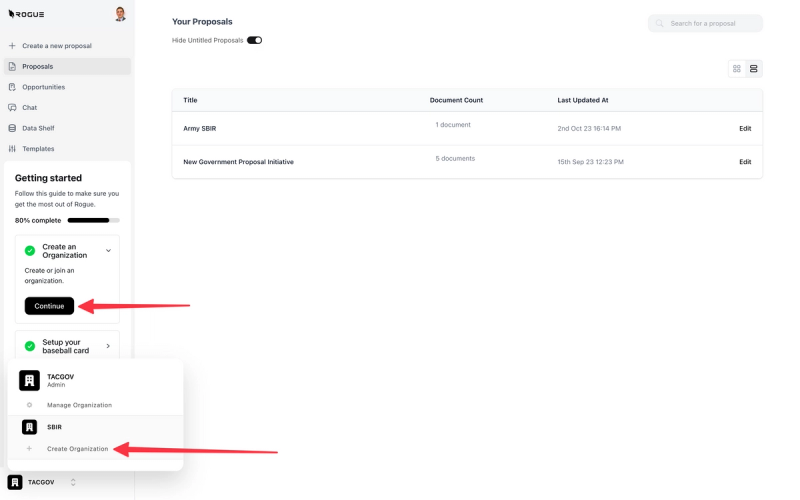
Create an Organization
Creating an organization is simple, you simply select the Organization menu in the bottom left of the screen, then select "Create Organization"
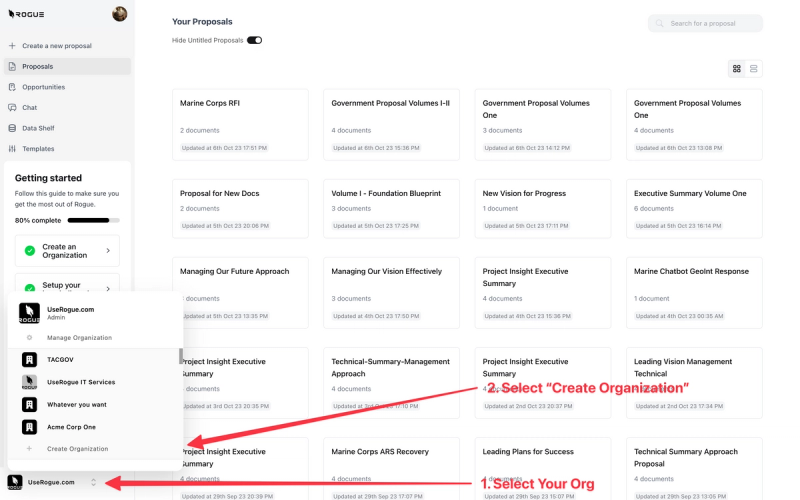
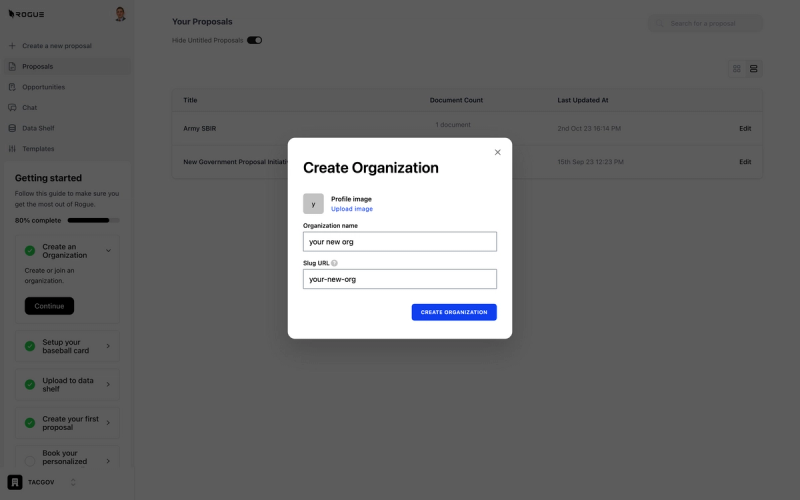
You can then give your organization a unique name and even a Profile Image.
Add Organization Members
Adding members is a very important step in the setup process. Organizations maintain separately, siloed, and encrypted data structures, so your users will not be able to access your organization and the data that reside within it unless you invite them.
Many users set up separate organizations for teaming partners to access to that they can collaborate on proposal efforts without concerns about sharing protected proprietary data.
To add members, again select the Organization menu, then select "Manage Organization"
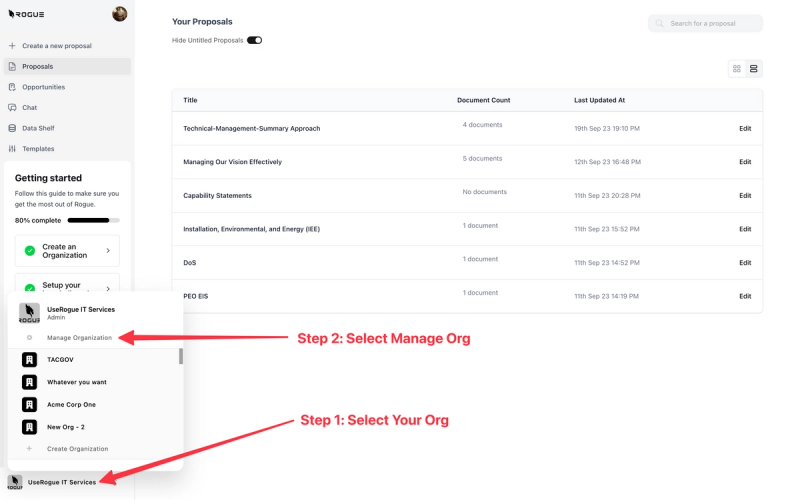
In the Management menu you can view all fo the members and their roles.
By default, the Organization's creator will be the organizaiton admin, only admin's can add or delete members from an organization.

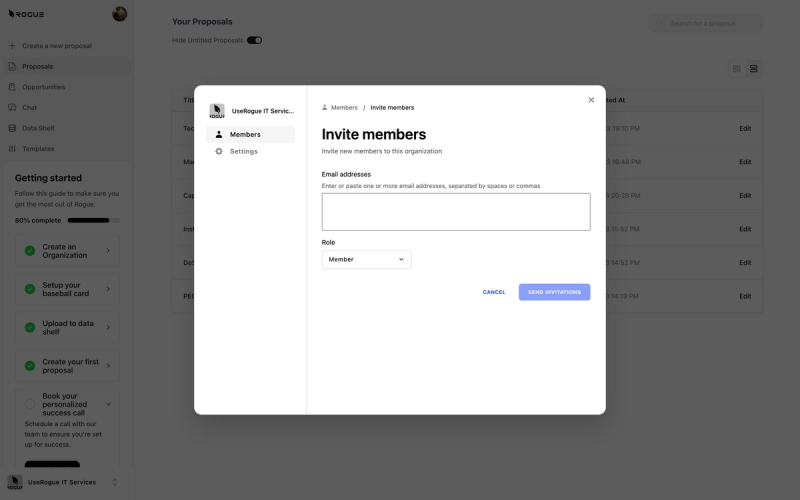
Admins can add or remove organization members and change their user role under the Invitations tab in the management menu.
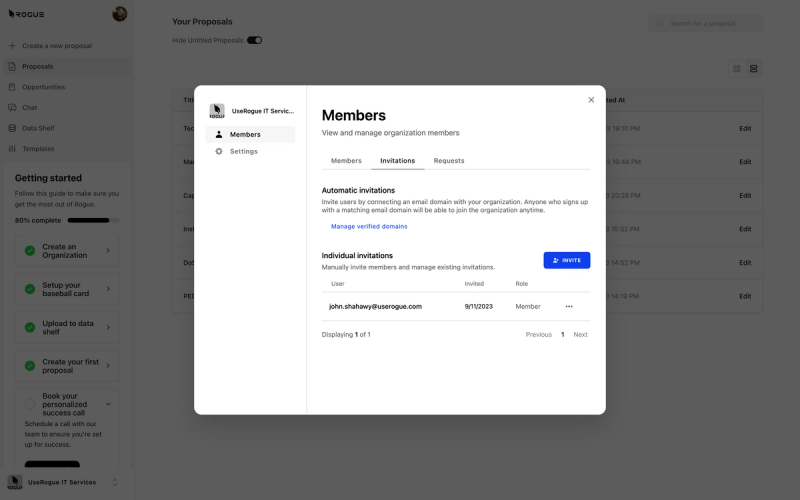
Inviting new members is as easy as adding them by email.
Each added member will need to accept the invitation sent to their email in order to gain access to the organization.
Customize Your Organization
One of the many important features of UseROgue is the ability to uniquely customize each organization that you establish. This becomes very potent when you tailor individual organizations for specific products or services, customers, or market segments. You can tailor how you represent your company and the AI will write as that tailored company.

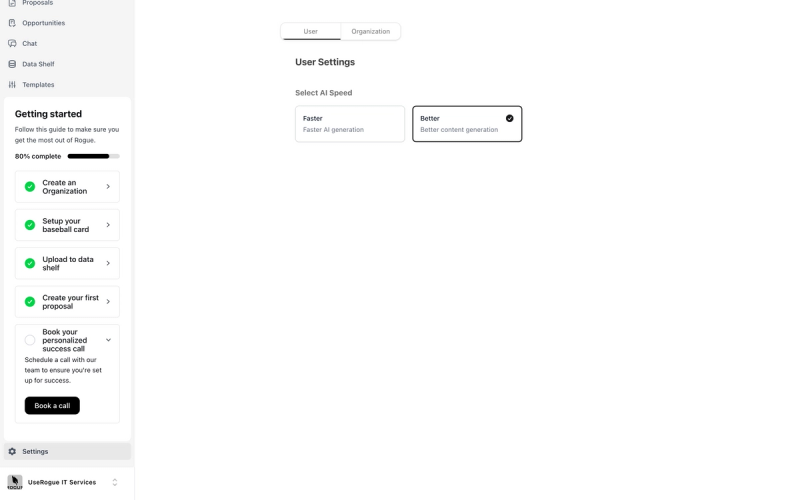
AI Speed
We offer two AI speeds, a faster model, which is very useful when you use the RogueChat to mine your data shelf.
The better model is ideal for any/all content generation. When in doubt, pick better.
Baseball card
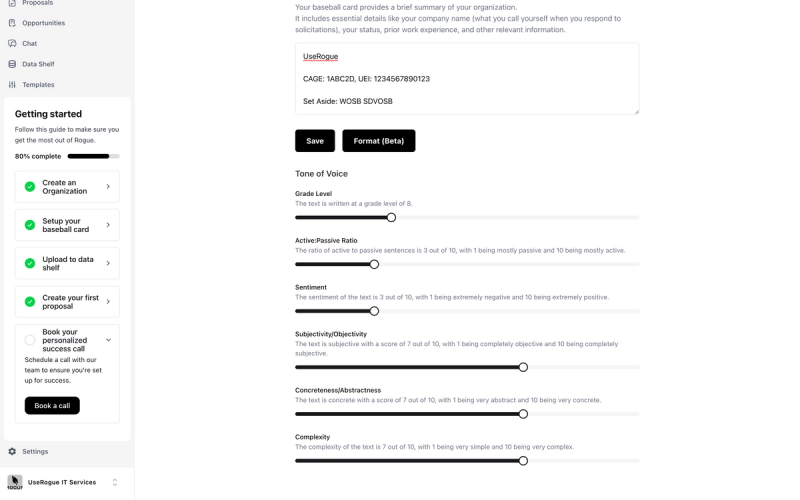
The baseball card is the way you represent your company, as you would on a company capabilities statement, including core capabilities, products, services, NAICS Codes, Socioeconomic set asides, contract vehicles, current customers and synopses of successful past performance. This baseball card is used as macro context for hte AI as it writes about your company.
This is an area where you can tailor how the AI articulates your company, if you set up multiple organizations, as suggested earlier, use the baseball card to differentiate those organizations.

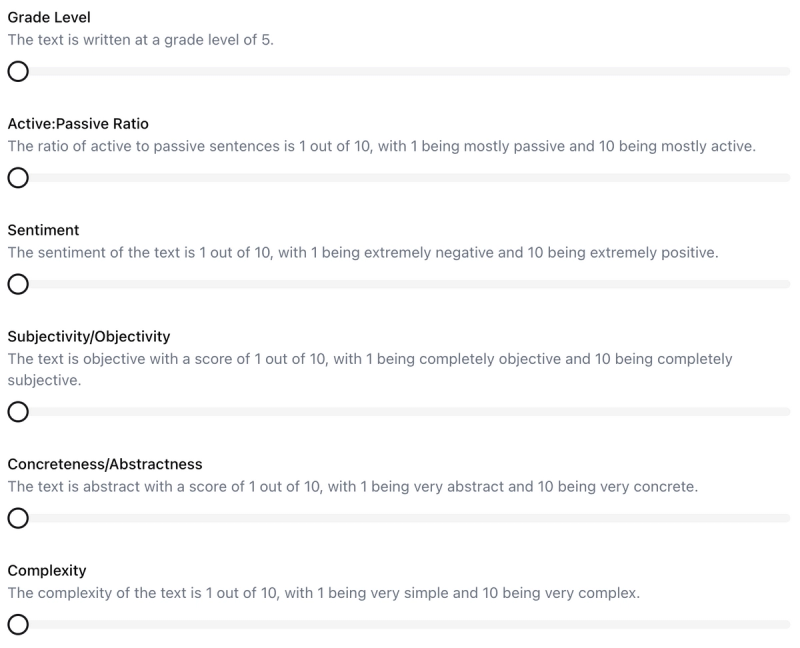
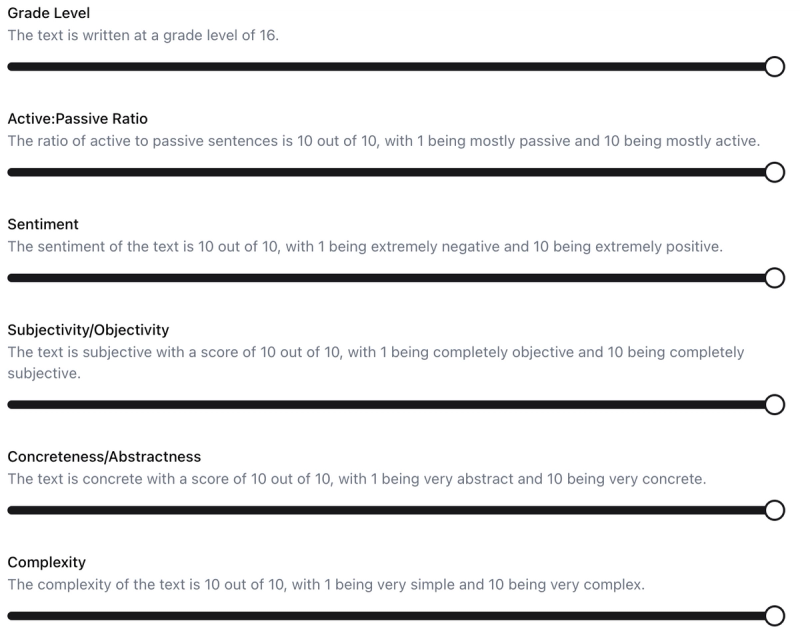
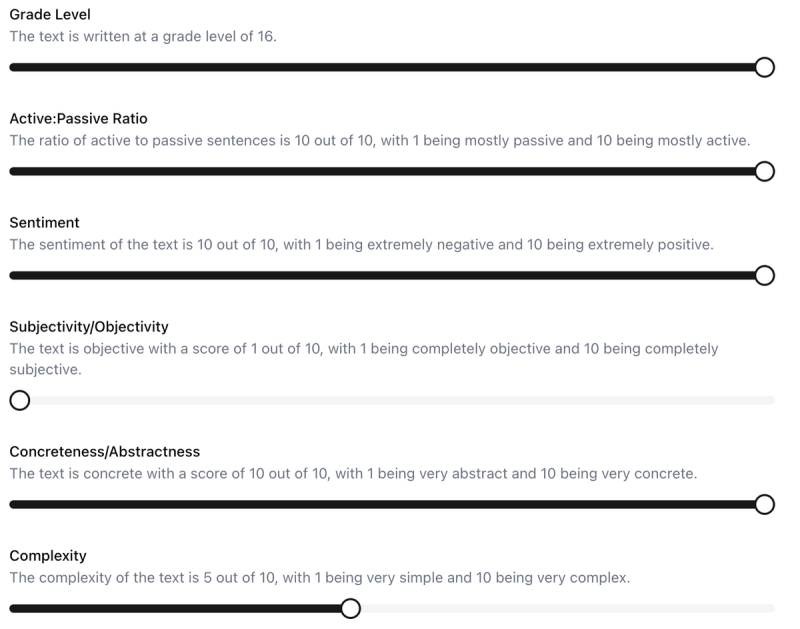
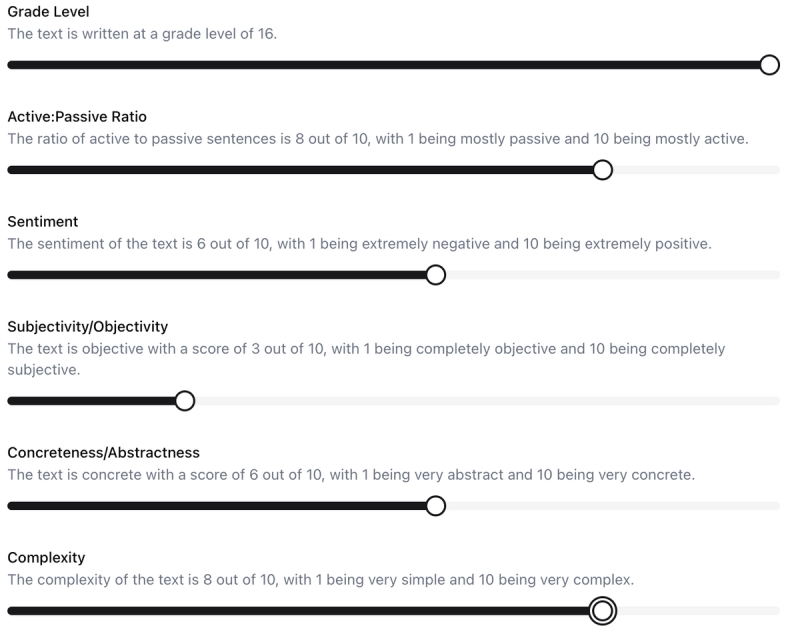
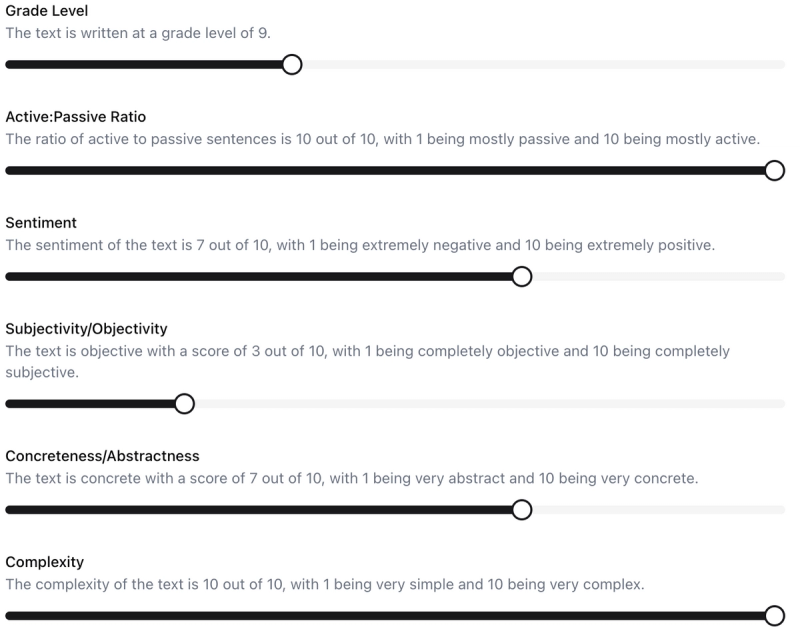
Tone settings
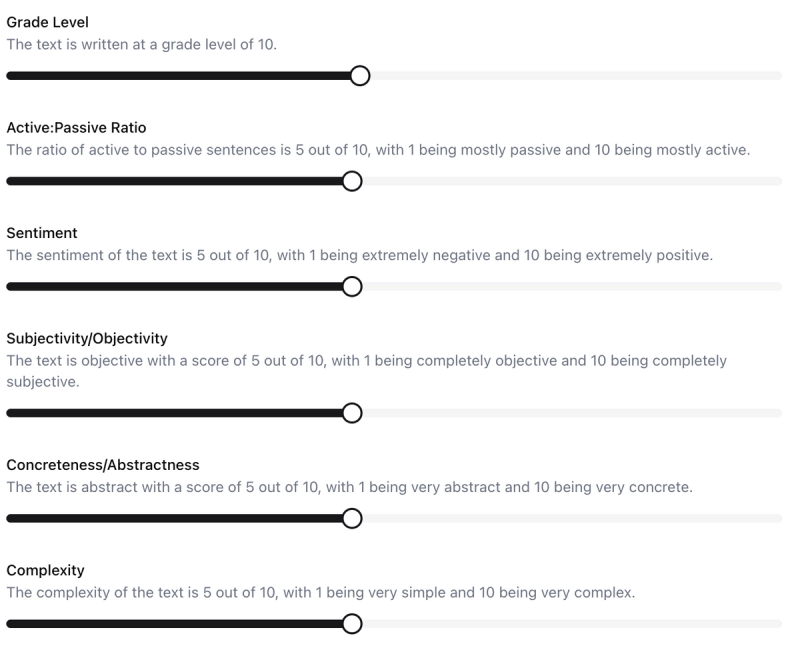
Tone of voice settings enable you to tune how the AI generates, varying elements like the grade level, active voice, and language complexity. Any user in an organization can change the tone settings at any time.
Below are some comparative examples of tone settings and corresponding outputs for the same input test:
Input text:
UseRogue will implement a scaled agile framework to deliver customer-driven software development.
Tone Setting:
Expand Tool Output Text: UseRogue will carefully implement a scaled agile framework to thoughtfully deliver customer-driven software development with care and attention. They will form cross-functional agile teams to focus intensely on delivering high value working software incrementally. These teams will work in short, timed iterations to rapidly incorporate customer feedback and ensure the product continues to meet evolving needs. Regular inspection and adaptation will allow the organization to respond to change and continuously improve. UseRogue is committed to delivering software that provides real, demonstrable business value to their customers through collaborative, iterative development within a structured yet flexible process.
Tone Setting:
Expand Tool Output Text: UseRogue had decided that it was time to improve their software development process. They wanted to deliver more value to their customers in shorter periods of time. The development team was skilled but often found themselves distracted by competing priorities and firefighting issues. Management understood they needed to implement a more structured approach if they wanted to successfully adapt to their customers' changing needs.
Tone Setting:
Expand Tool Output Text: UseRogue will carefully implement a scaled agile framework to thoughtfully deliver customer-driven software development with care and attention. They will form cross-functional agile teams to focus intensely on delivering high value working software incrementally. These teams will work in short, timed iterations to rapidly incorporate customer feedback and ensure the product continues to meet evolving needs. Regular inspection and adaptation will allow the organization to respond to change and continuously improve. UseRogue is committed to delivering software that provides real, demonstrable business value to its customers through collaborative, iterative development within a structured yet flexible process.
Tone Setting:
Expand Tool Output Text: UseRogue will carefully implement a scaled agile framework to thoughtfully deliver customer-driven software development with care and attention. They will form cross-functional agile teams to focus intensely on delivering high value working software incrementally. These teams will work in short, timed iterations to rapidly incorporate customer feedback and ensure the product continues to meet evolving needs. Regular inspection and adaptation will allow the organization to respond to change and continuously improve. UseRogue is committed to delivering software that provides real, demonstrable business value to their customers through collaborative, iterative development within a structured yet flexible process.
Tone Setting:
Expand Tool Output Text: The implementation of a scaled agile framework will allow for thoughtful, customer-driven software development with care and focus. Cross-functional agile teams will intensely deliver high value working software in short, timed increments. This allows for rapid incorporation of customer feedback to ensure the product continuously meets evolving needs through regular inspection and adaptation. Commitment to delivering demonstrable business value through collaborative, iterative development within a structured yet flexible process will allow the organization to respond to change and continuously improve. Sentences are purposefully complex with multiple clauses and abstract subjects to achieve the specified complexity level while maintaining objectivity and fact-based information.
Tone Setting:
Expand Tool Output Text: UseRogue will carefully implement a scaled agile framework to thoughtfully deliver customer-driven software development with care and attention. They will form cross-functional agile teams to focus intensely on delivering high value working software incrementally. These teams will work in short, timed iterations to rapidly incorporate customer feedback and ensure the product continues to meet evolving needs. Regular inspection and adaptation will allow the organization to respond to change and continuously improve. UseRogue is committed to delivering software that provides real, demonstrable business value to their customers through collaborative, iterative development within a structured yet flexible process.
Data Shelf Setup
All organizations are separately segmented, logically separated, and separately encrypted, this is for the absolute safety of your proprietary data. Which means you have to upload documents separately into each organization.
Adding documents to your data shelf is as simple as any document upload.
First, select the category of document you are uploading.
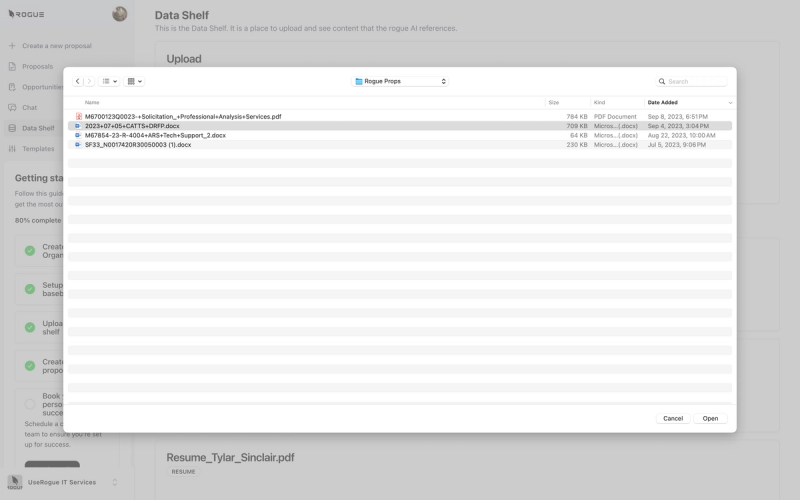
Then, select the "Choose File" field.
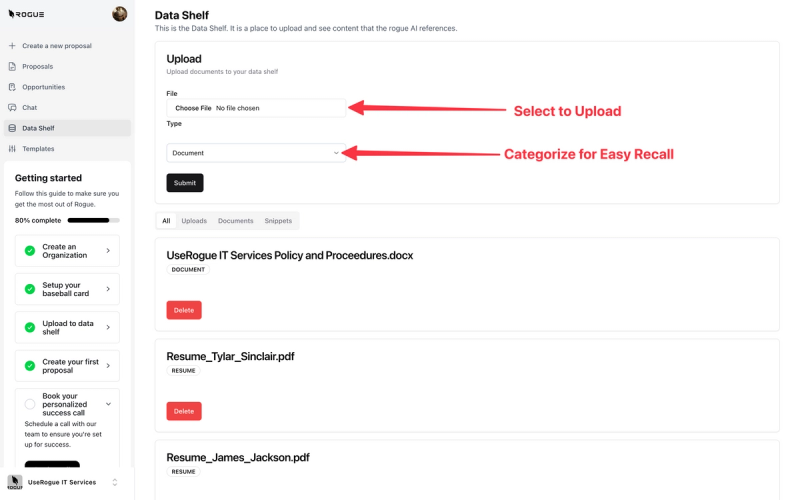
Then navigate to the file structure location of the document and select "Submit"
You can view all of your documents in one place in the data shelf, both those that you upload and those which you create in UseRogue.
Note, you can elect to include or exclude documents from indexing by selecting the check box. Indexing means that the AI will search through that document and potentially reuse it's contents in generating new content.

Templates
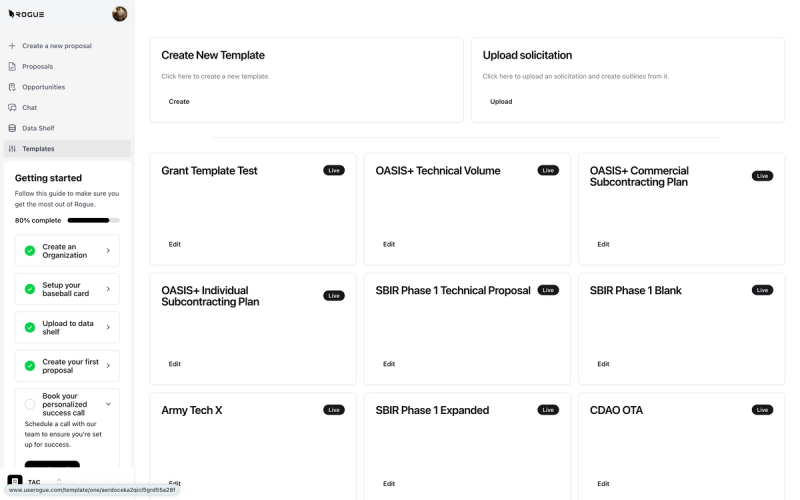
Templates are most useful for solicitations and document types that have common formats for instance, many MAC/IDIQ contracts, broad agency, announcements, RFI's, Source Sought, and other open calls tend to maintain standard formats. With these types of solicitations, it is less efficient to go through the RFP upload function because the document templates will always be the same, so we enable you to shortcut this process, by simply establishing a document template.
You can create a template from scratch by selecting "Create New Template" or by uploading a solicitation by selecting "Upload Solicitation"
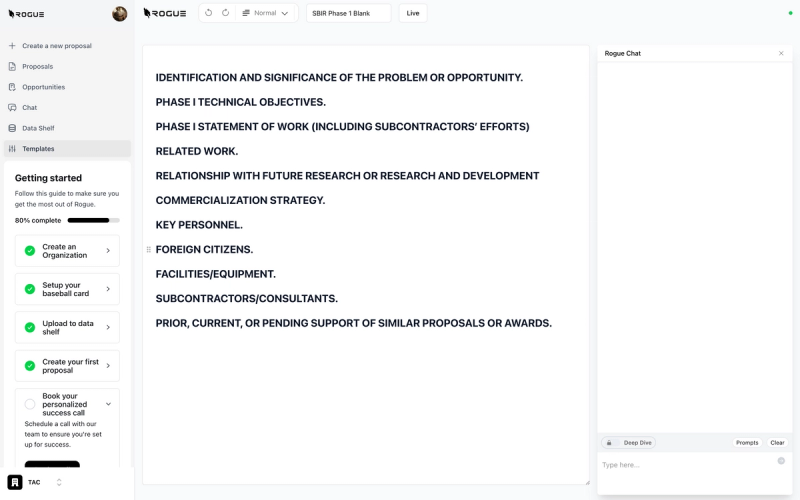
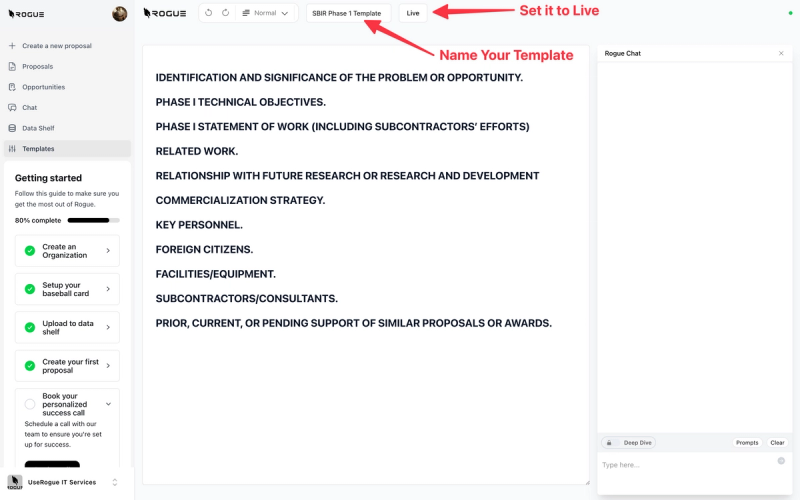
To make a template from scratch simply paste the HEADERS for your document.
It is important that you only paste the headers for the sections of the document, the AI will use each header as a cue for generating semantically relevant content. If you have structured content like header material, company overview content, etc, it is best to save that content as a snippet (more on that later).
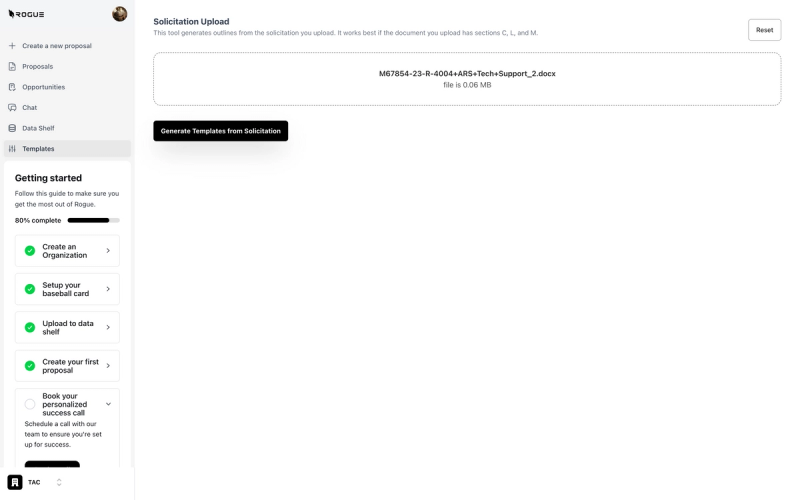
To create a template by Uploading a Solicitation simply select the upload field.
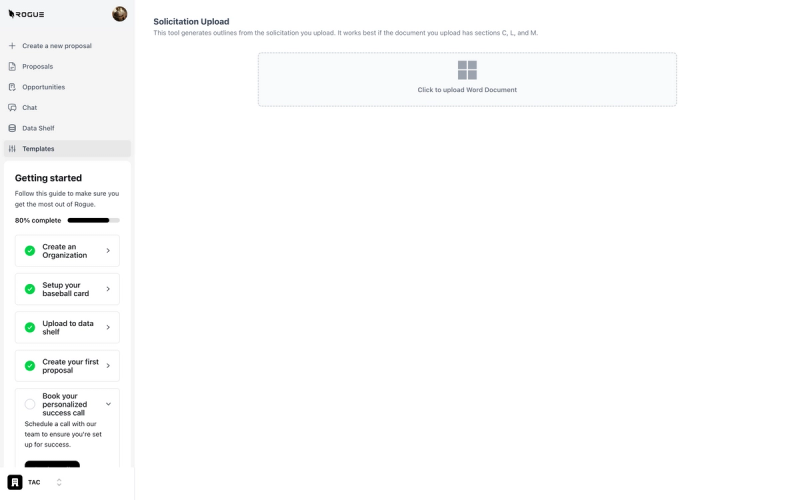
Then select the solicitation you would like to parse.
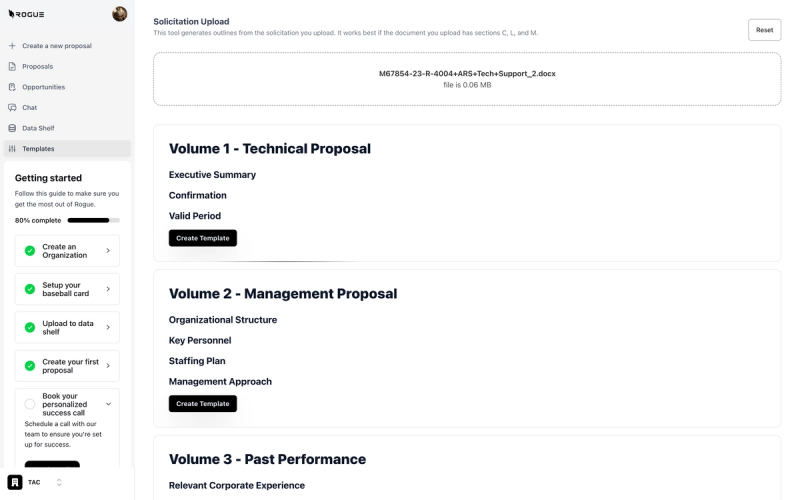
And finally select which document templates you would like to generate.
With either process, be sure to name your template and set it to "Live" to use it in generations.
Start Writing
The writing tools are the core of the UseRogue platform and we built them to mirror the industry best practices of proposal writing.
War Room
The war room is designed to digitally re-create the industry practice of physical proposal management war rooms. Rather than physical office spaces with proposal documents, and personnel collaborating in person, we re-created that experience within the platform. The war room serves as both a knowledge management and a proposal management environment so that you can maintain all of the documents and the workflows from pre-capture and capture processes through proposal drafting and submission.
Naming the War Room
Be sure to name your war room, we advise using a name that aligns with your company internal reference to the opportunity such as "PACTS III" so that everyone within the organization can easily find an identify that effort.
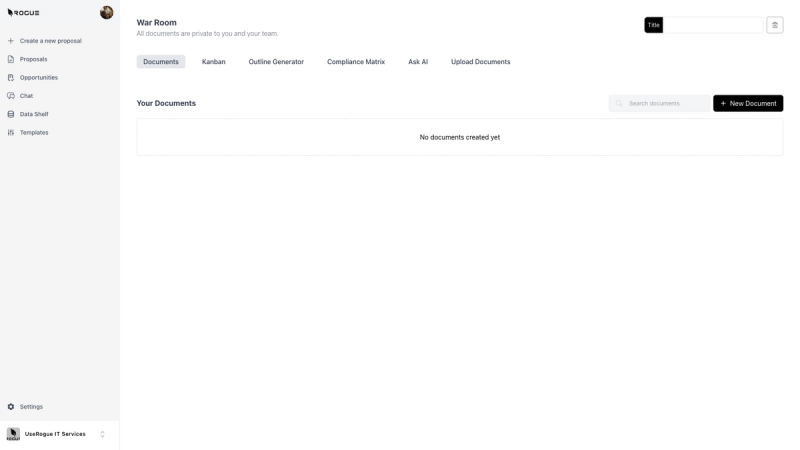
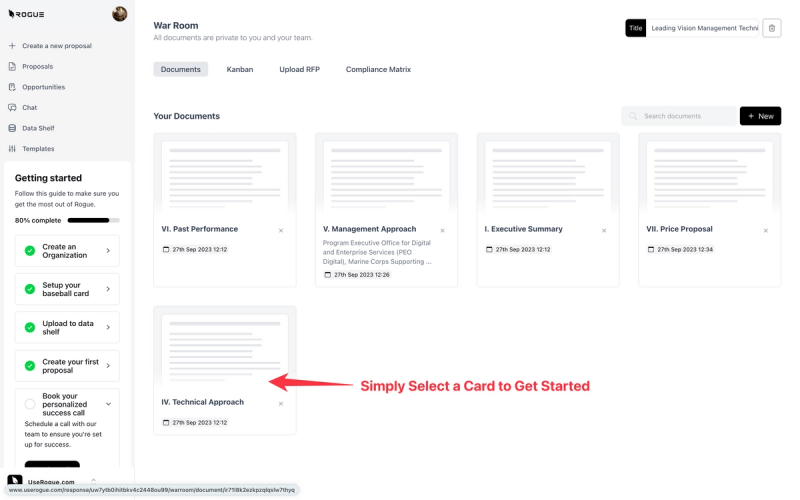
The Documents Tab
The documents tab houses all of the documents that you generate and/or create within a war room. Think of this as your document library for this specific proposal effort.

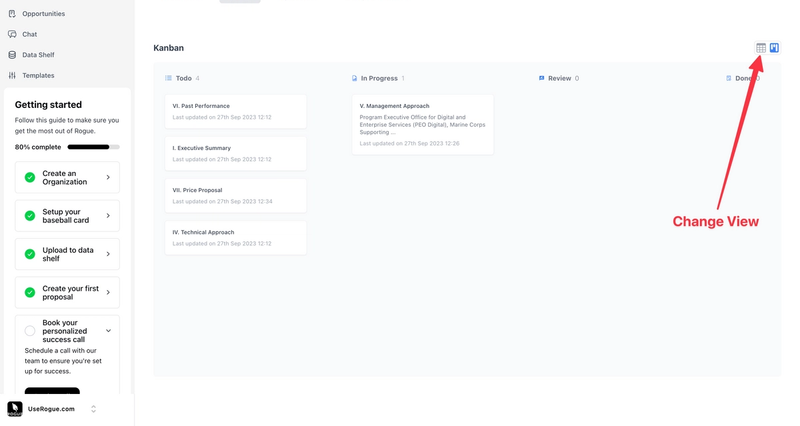
The Kanban Tab
The Kanban Board is a straightforward and simple interface for tracking. You are proposal efforts and documents through the writing, review, and submission workflow. The board is completely optional and available to all users within a organization. Note that you can also view the board in list view by selecting the small table icon in the top right of the KanBan Board.
Outline Generator Tab
The Outline Generator, or "document shredder" function is intended to ingest, solicitation documents, index on sections, C, L, and M, to extract the format, required components, and specify tasks listed in the solicitation.
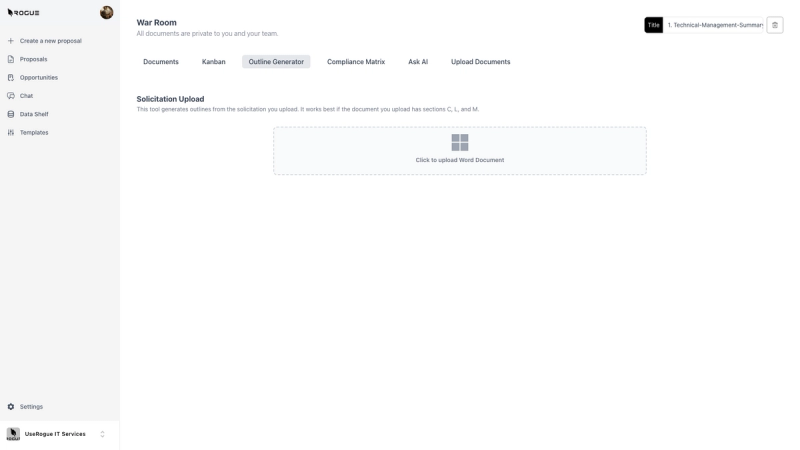
Uploading documents is very simple. Simply click the upload word document field and navigate to the location of the desire document within your computers file structure note, that we require a word document for upload, this is primarily due to variations in PDF file, formatting and contents. If you are working with a PDF document, we encourage you to use the PDF editor and convert PDF documents to Microsoft Word documents prior to upload.
Select Documents to Generate
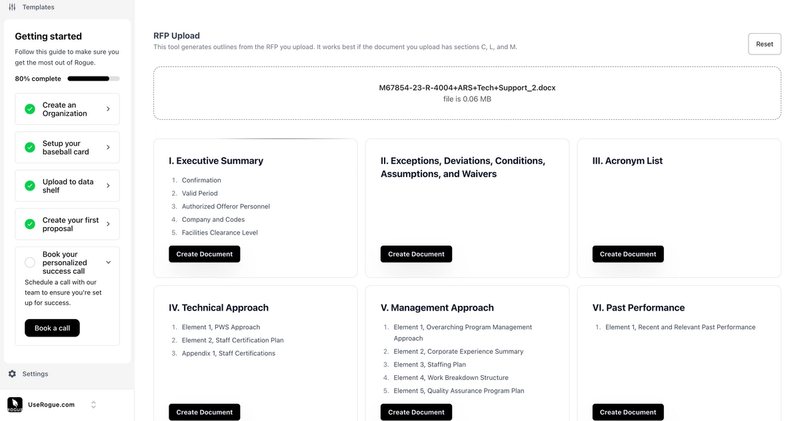
Once you select the desired document, simply select the generate button, and the AI will produce cards for each of the documents that it understands as being required from the solicitation. This is simply a menu of draft outlines, at this point you can select the "create document" button for each of the outlines that you wish for the AI to generate. If you do not select the "create document" button, that document will not be created. Each of the documents, you choose to create will be stored automatically under the documents tab.
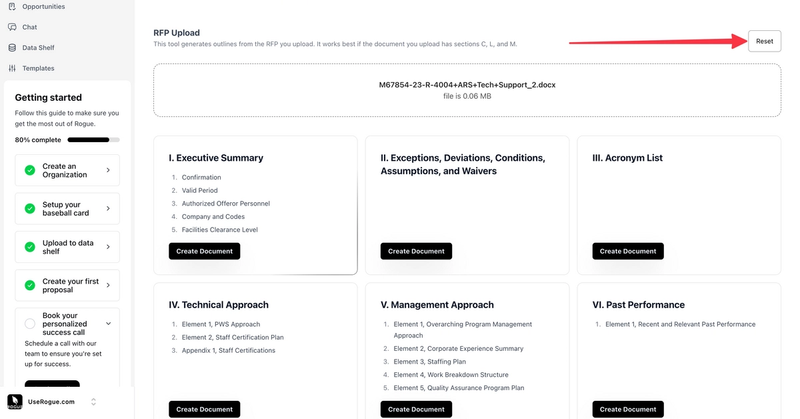
Reset as needed
if for any reason you need to restart the process, simply select the reset button in the top right of the RFP upload screen.
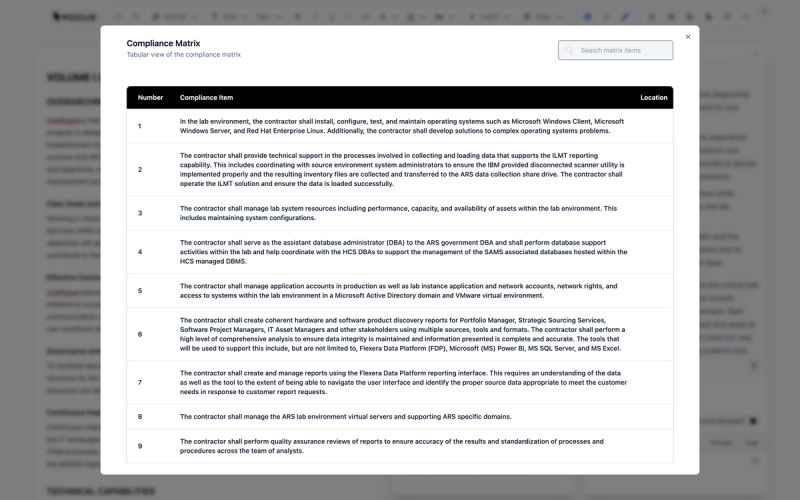
Compliance Matrix
The compliance matrix tool allows you to upload an RFP or other document from which the AI will extract each sentence that includes key phrases like shall, will, may, must, etc.
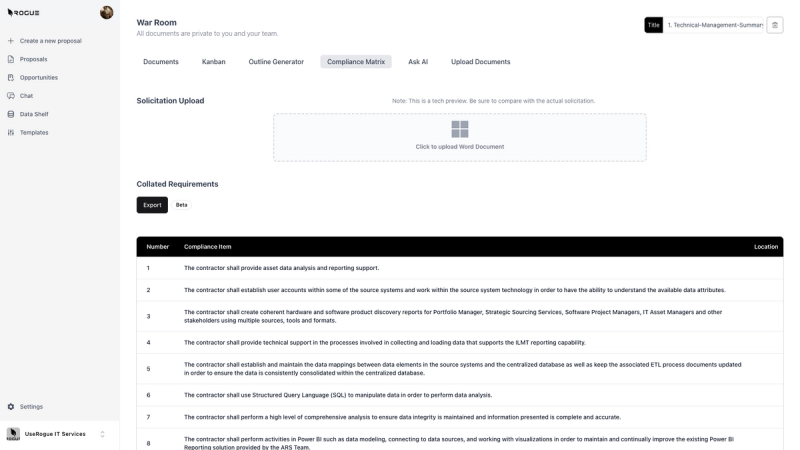
The AI will then generate exhaustive list of the statements along with their section reference. You can export this compliance to matrix to an excel document. However, the real capability comes later in the writing interface, where we will turn these compliance matrix items directly into draft content.
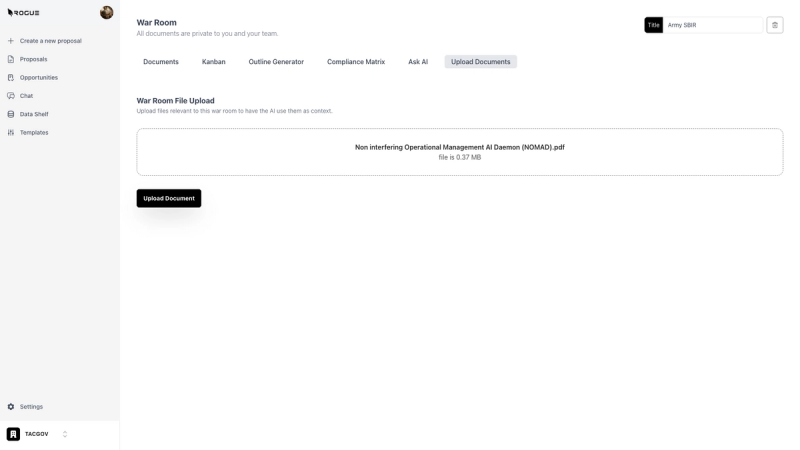
Upload Document Tab
There are many times when an RFP comes with multiple documents of which make sense in order to write a complete and compliant proposal. The document upload tab within the War Room enables you to do just that, and then chat with those documents to accelerate your writing.
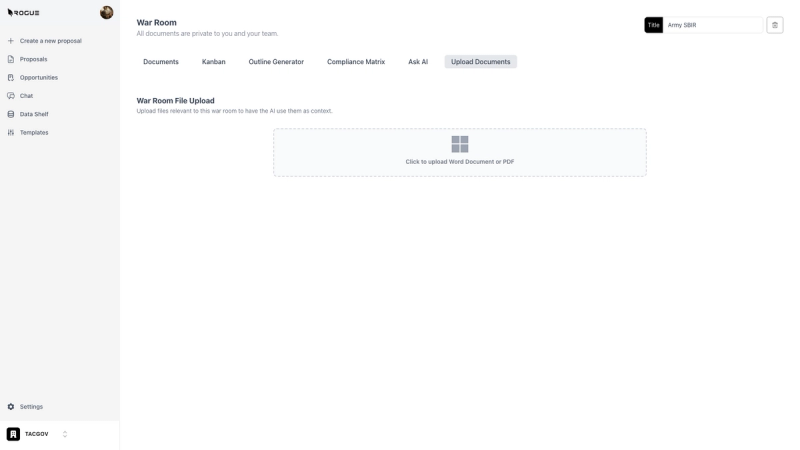
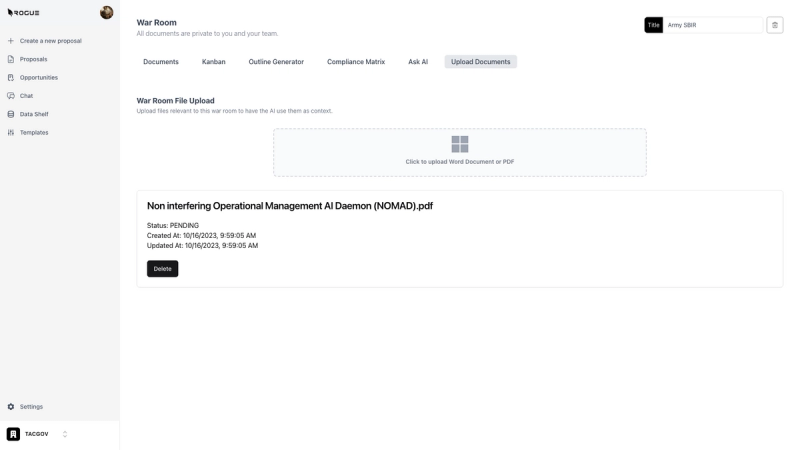
Simply select the upload button and select documents to upload.
Those documents are instantly available within the war room, both for the chat and for Deep Dive within the writing interface.
AskAI Tab
AskAI enables you to use the power of AI chat within the context of an individual War Room and proposal effort.
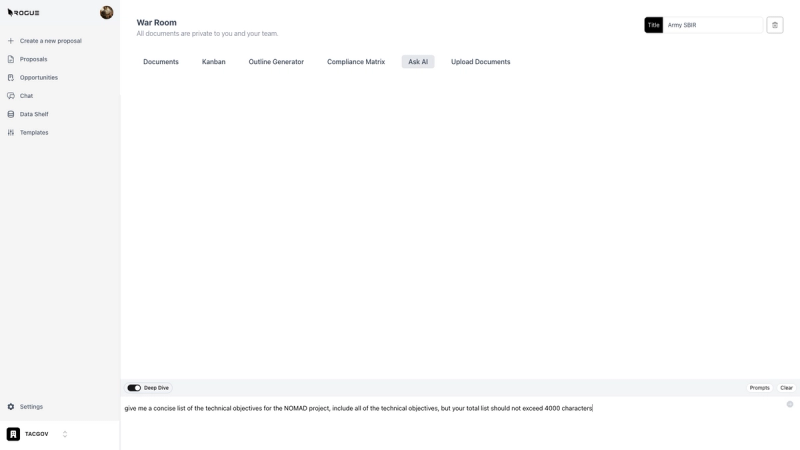
Use plain language or more precise instructions to leverage the power of AI for any number of tasks.

As an example, imagine you want to extract key points or features form a document so that you can use it in your initial document outline.
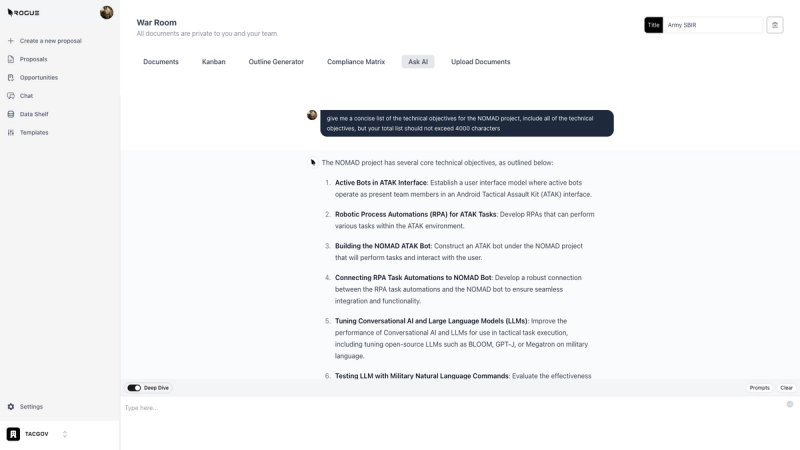
The AskAI feature can help you do just that.

Writing an RFI Response
We have two ways to write an RFI response: manual or AI-draft. Both get you to the same document editor, the only difference is who writes the initial draft, you or the AI.
AI Draft
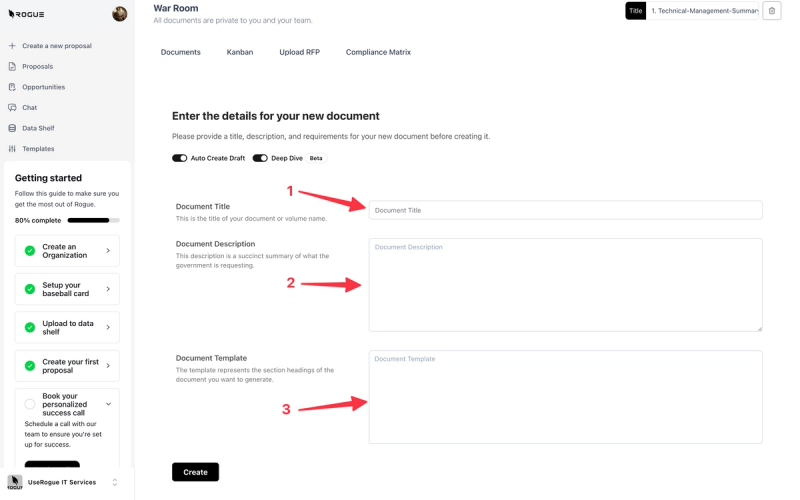
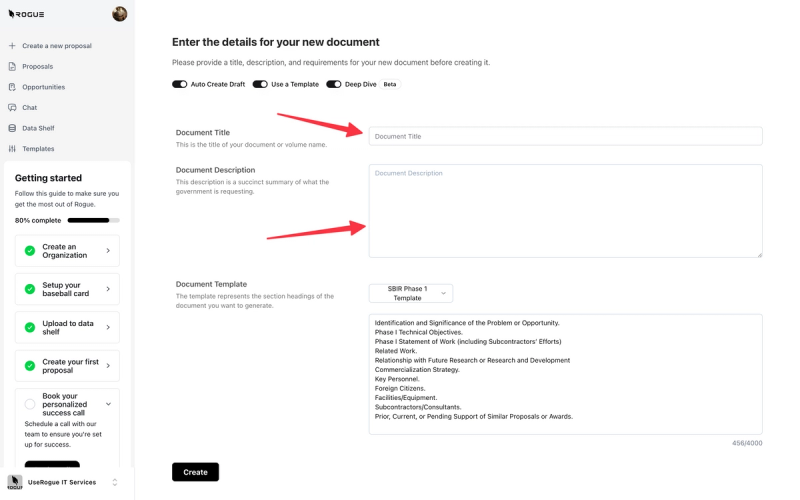
To utilize the artificial intelligence in the initial draft generation, the platform will need three key pieces of input:
1. A document title. The document title should be whatever you intend to name the document, if the government tells you what to name it then you can put that name.
2. A document description. The government typically give us a good description of what they are requestion information about, just copy-paste it here. This description section provides the artificial intelligence with the context and semantics of what you need to write.
3. A document template or outline. Again, for RFI's the government typically stipulates what questions they want you to answer here, just copy and paste them directly into the Document Template block.
Then simply hit "create".
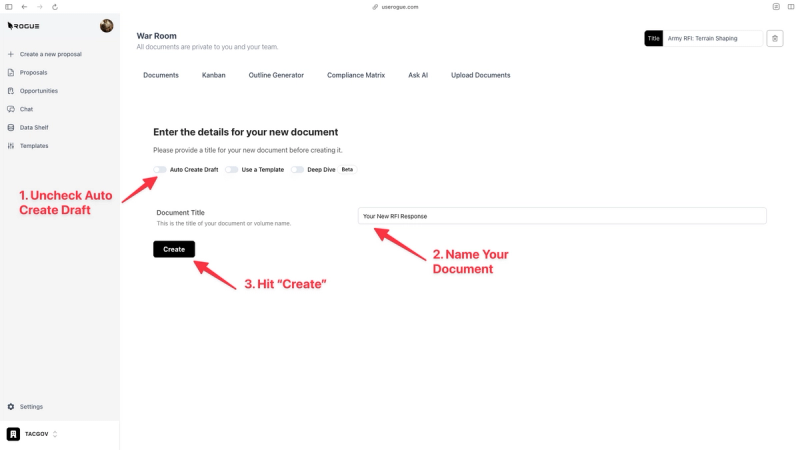
Manual Draft
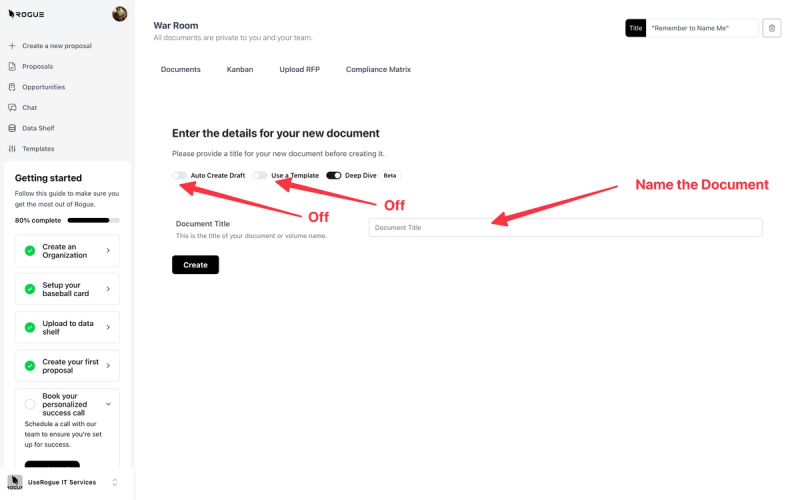
The manual process give the human a little more direct control and bypasses the AI generation.
1. Uncheck the "Auto Create Draft" toggle, this will skip the AI generation step and take you straight into the document editor
2. Name your document
3. Hit "Create"
The result will be a blank document. Here you can simply paste in the response format provided by the government and start using the power writing tools to draft out your response. A pro tip is to use the @ symbol to call up your data shelf documents that are most relevant to the RFI response tell the AI to simply write responses to each of the RFI items and the AI will index the specific documents you called up - no more document mining!.
Below is a quick walkthrough video for both approaches:
Writing a Proposal
We have a number of approaches for writing proposals and other documents ranging from very simple with minimal intervention by the user and maximum generation by the artificial intelligence, to more complex where the user has maximum control, and the AI provides only a supporting role. To utilize the artificial intelligence in the initial draft generation, the platform will need three key pieces of input:
1. A document title. The document title should be whatever you intend to name the document, this could be a volume number, followed by a title or perhaps it's a singular RFI response. In any case, the AI utilizes the document title as part of its initial generation logic, so please be sure to name the document accurately.
2. A document description. The document description is the most concise and accurate articulation of what the government is seeking. We commonly use background paragraphs from a Statement of Work, the Desired Capability descriptions, or other discuss descriptions as provided by the government. This description section provides the artificial intelligence with the context and semantics of what you need to write.
3. A document template or outline. Finally, the document template is the outline for the document you wish to create. This should be strictly the section headers for your document. with any of the auto generation processes, the AI will use the document template and generate semantically relevant content for each section header. This stage is an excellent opportunity for initial document, outlining and approach solutioning. including solution cues as headers in the document template can save an immense amount of time later in the writing process.
Start from a Shred
To start from a document shred you first navigate to the upload RFP tab in the war room as described previously. Once you select the document documents to initially outline under the "Upload RFP" tab, you start writing by selecting the document you want to work on.
Step 1. Edit the Name: The upload function will provide a draft name, but you should ensure that it is the name you want for the document
Step 2. The Description: The document description is the most concise and accurate articulation of what the government is seeking. We commonly use background paragraphs from a Statement of Work, the Desired Capability descriptions, or other discuss descriptions as provided by the government. This description section provides the artificial intelligence with the context and semantics of what you need to write.
Step 3. The Outline: the document shredder, Will transfer, what it analyzed as the required section headers for the particular volume based off the RFP. However, this stage is an excellent opportunity to improve from the initial document, outlining and approach solutioning. including solution cues as headers in the document template can save an immense amount of time later in the writing process.

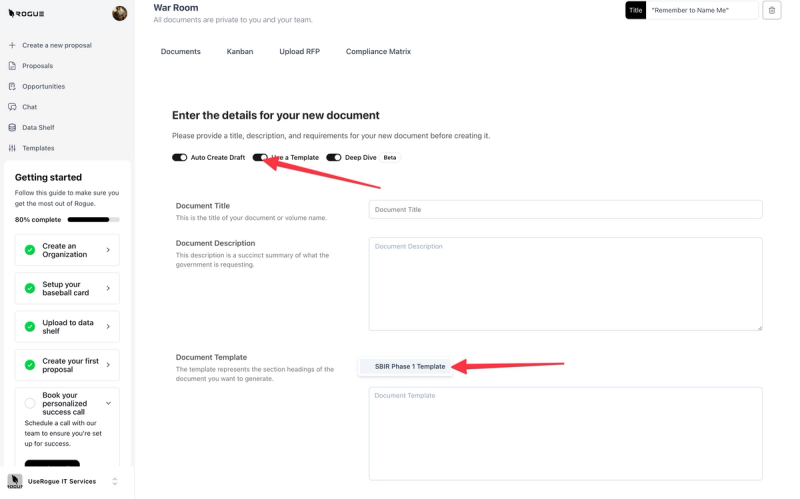
Start from a Template
Starting from an template, requires that you first construct an outline within the system. The start from an outline function is best suited for solicitation types that have common proposal formats for instance, many MAC/ID, IQ contracts, broad agency, announcements, and other open calls tend to maintain standard formats. With these types of solicitations, it is less efficient to go through the RFP upload function as the document templates will always be the same, so we enable you to shortcut this process, by simply establishing a document template.
To begin toggle the "Use a Template" option
If this option is not visible, it means that you do not have a live template in this org, double check that you have a template in your org and ensure it is live.
Step 1. Edit the Name: The upload function will provide a draft name, but you should ensure that it is the name you want for the document
Step 2. The Description: The document description is the most concise and accurate articulation of what the government is seeking. We commonly use background paragraphs from a Statement of Work, the Desired Capability descriptions, or other discuss descriptions as provided by the government. This description section provides the artificial intelligence with the context and semantics of what you need to write.
Step 3. The Outline: The outline will drop in as you have it in the saved template. However, this stage is an excellent opportunity to improve from the saved template, outlining and approach solutioning. including solution cues as headers in the document template can save an immense amount of time later in the writing process.
Start from a Current Document
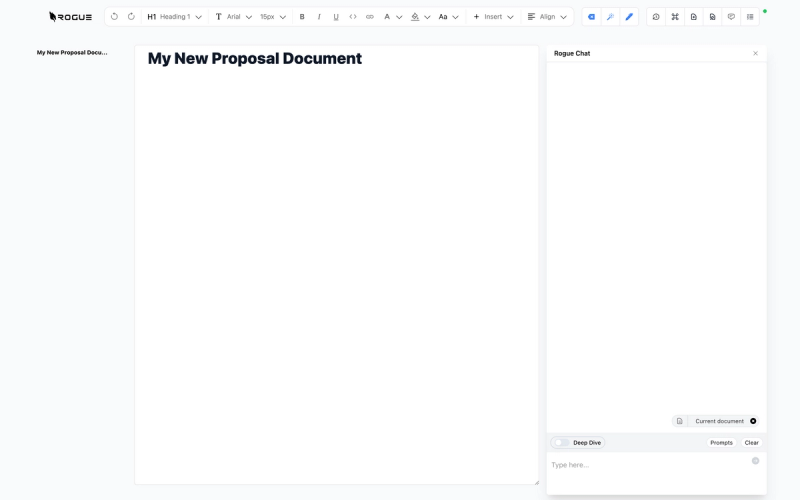
Starting from a current document is essentially skipping to the document editor.
To do so, toggle off the "Auto Generate Draft" and "Use a Template" option.
Give the document a name a select "Create"
You will move straight to the document editor interface where you can copy from your proposal in MS Word or other word processors and paste it directly into the writing interface.
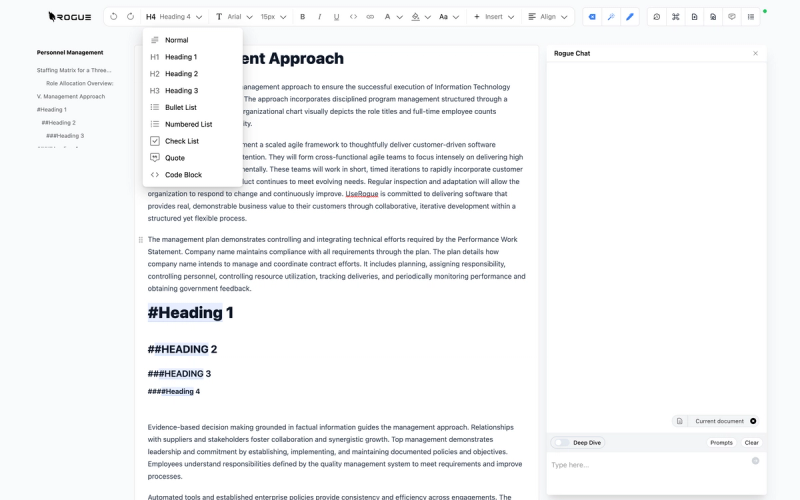
The Writing Interface
The UseRogue writing interface is a full-featured word processor with all of the formatting options you expect. Note that UseRogue uses open markdown format, so copying and pasting between UseRogue and any other word processor is seamless.
UseRogue features multi-user capability, any members of an organizaiton can edit any document in that organizaiton simultaneously. Passing drafts around by email or shared drive is a thing of the past.
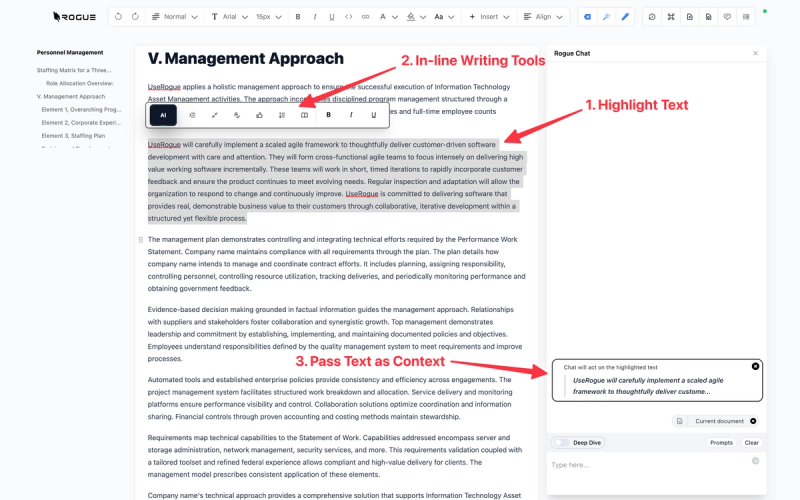
In-Line Writing Tools
The in-line writing tools enable you to write 10x faster, and it all starts when you highlight a piece of text.
When you highlight text you will notice that the writing tool bar pops up, that same text is also passed as context to the Rogue Chat bar to the right.
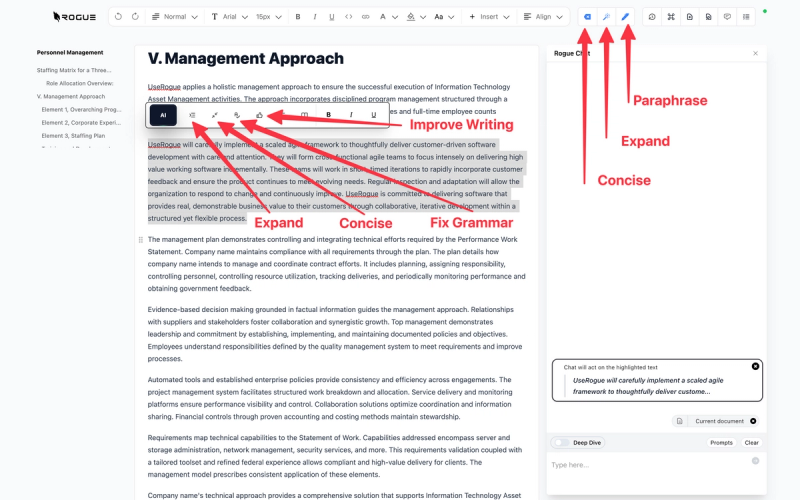
The in-line writing tool bar has a number of power writing tools, including:
1. Expand - turn a sentence into a paragraph or a paragraph into a page, great for turning bullet points from your technical folks into fully formed proposal content.
2. Concise - cut all of the extraneous language out of a piece of writing, great for getting under page count.
3. Fix Grammar - let the AI do your copy editing
4. Improve Writing - turn jargon-laden or complex writing that maybe does not match your one voice into a consistent and readable section.
You can use the same highlight function to invoke the in-line AI tool, simply highlight a piece of content and select the AI button.
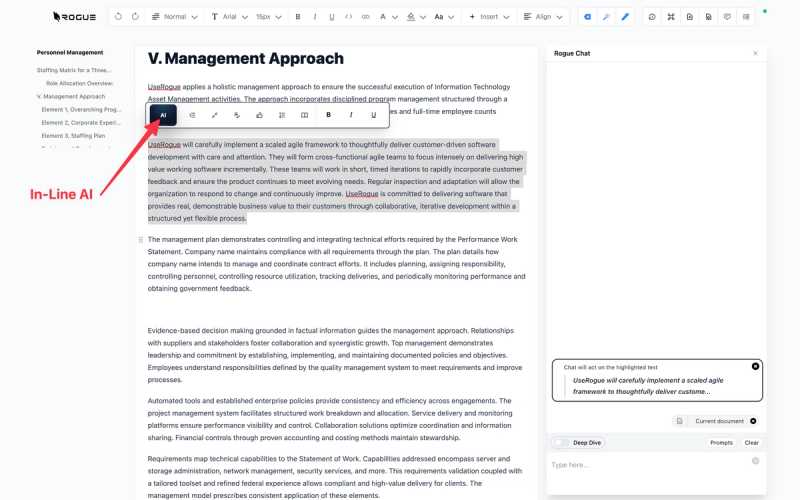
Prompt engineering is not necessary with UseRogue, just give the chat plain language instructions.

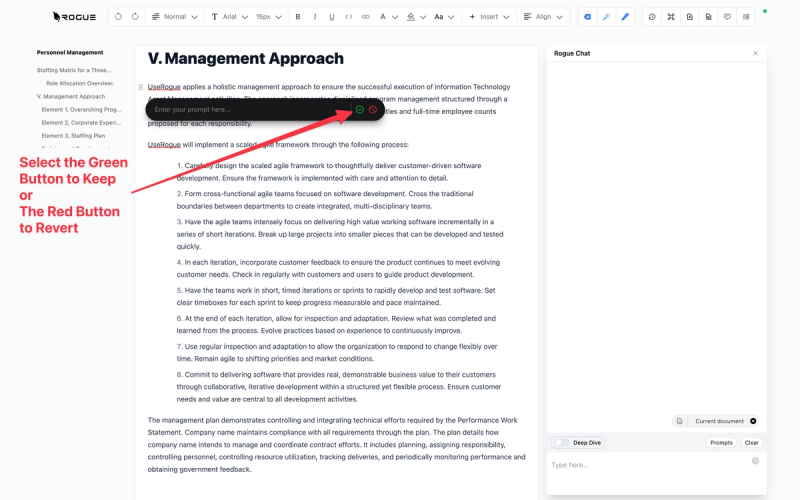
The in-line AI tool will automatically generate content and drop it directly where you are writing.
If you like what it generated select the green check mark, or reject it with the red x.
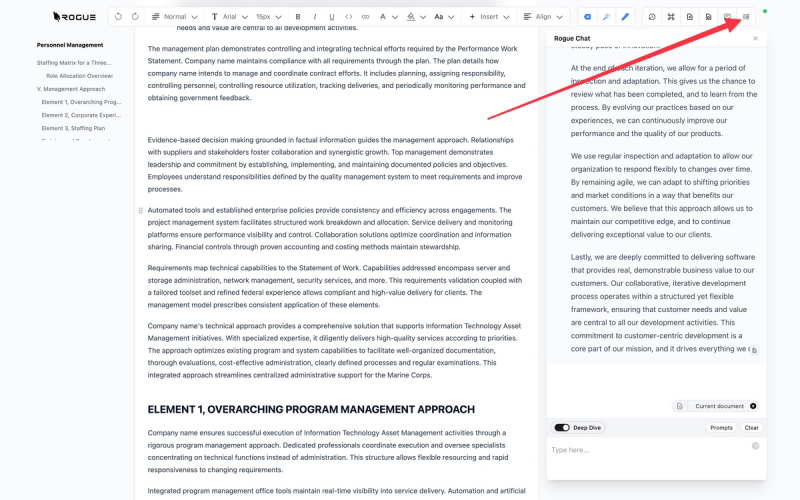
RogueChat
Chat is not a product, it's a feature, and if it requires prompt engineering then it's a poor feature.
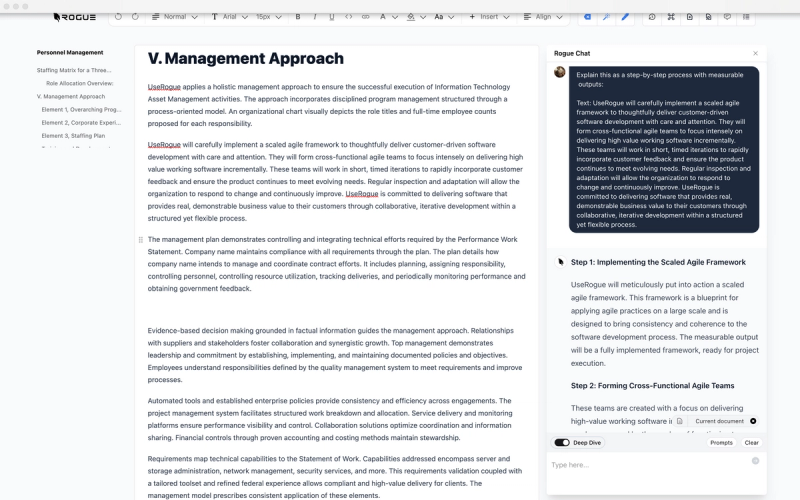
With RogueChat you can simply select a piece of content and make plain language instructions to the chat, just like the in-line tool, but for much longer, larger, and more complex content.
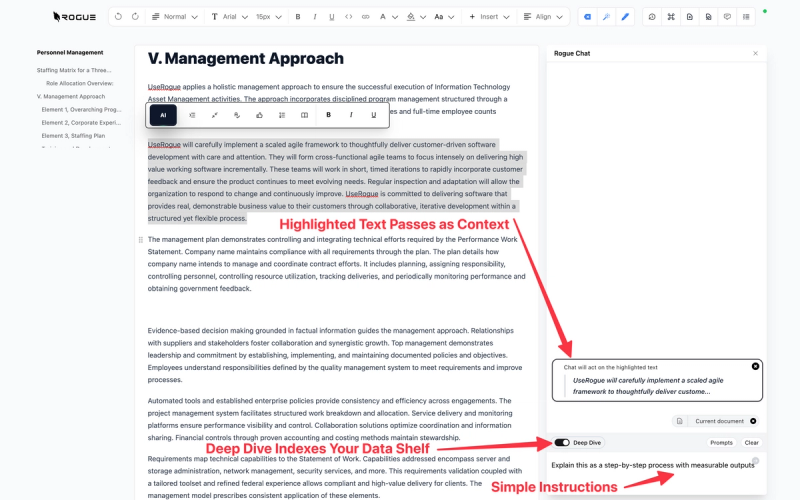
Selecting Deep Drive enables the chat to index your data shelf, by doing so the chat will semantically search for content in your data shelf that matches the content you selected and use that content as feedstock for it's generation. This enables the AI to speak about your company, goods, services, approaches, etc not just as you would, but as you have in past proposals. Now, the AI is not simply going to regurgitate your old content, because it also uses the current document as context, so it will meld the two, as a human would when reusing content.
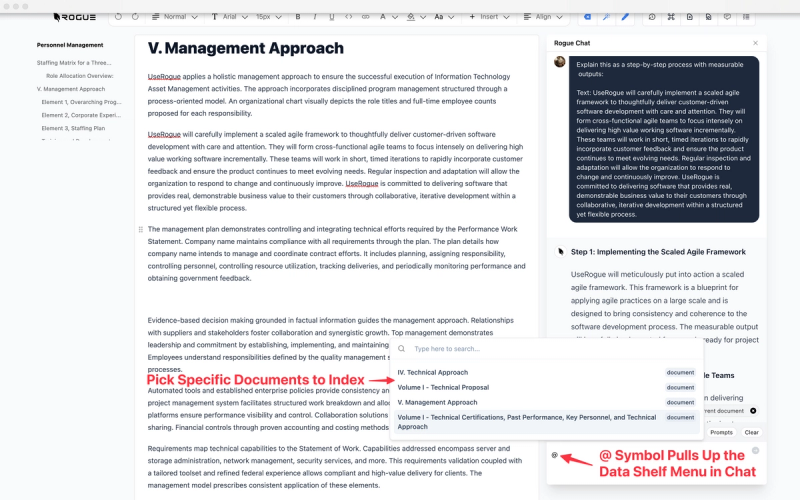
To add another degree of control, if you know of a document on your shelf that you want the AI to index specifically, you can type the @ symbol and pick documents from your shelf and pass them to the AI specifically.
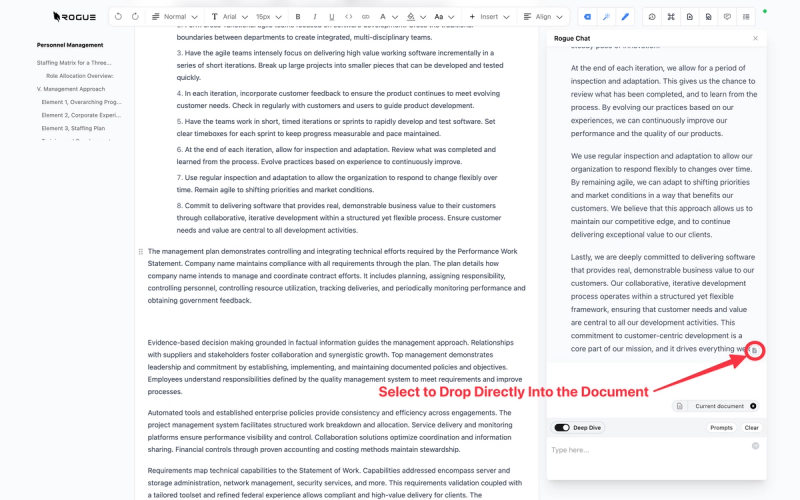
Whenever you use RogueChat you can drop the generated content directly into the writing interface by selecting the small document icon at the bottom of the generaiton. The content will drop in wherever you left your cursor.
Compliance Matrix
The Compliance Matrix tool suite is designed to help you get to a compliant proposal as fast as possible so you can focus on proposal quality.
All of your compliance items are listed in one place with a search bar to help you find compliance requirements.
Note: the compliance matrix is federated across all documents in a war room, so you can keep track of compliance requirements regardless of which volume you may be working in.
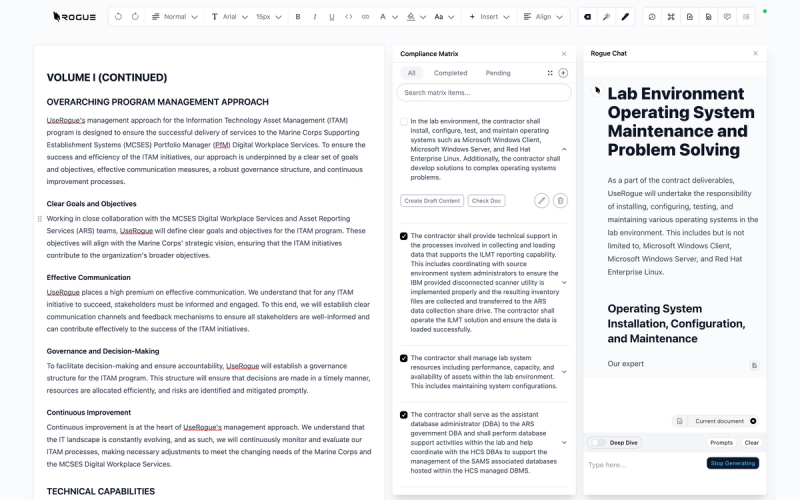
In the complinace matrix menu you have a number of options:
1. Toggle through items to see which have been completed and which are still outstanding
2. Selecting "Generate Draft Content" will create semantically relevant content, and doing so with Deep Drive toggled will generate relevant content with your data shelf as feedstock
3. Check compliance for a given item throughout the document

4. View all items
5. Add compliance items, which can be done individually by hand
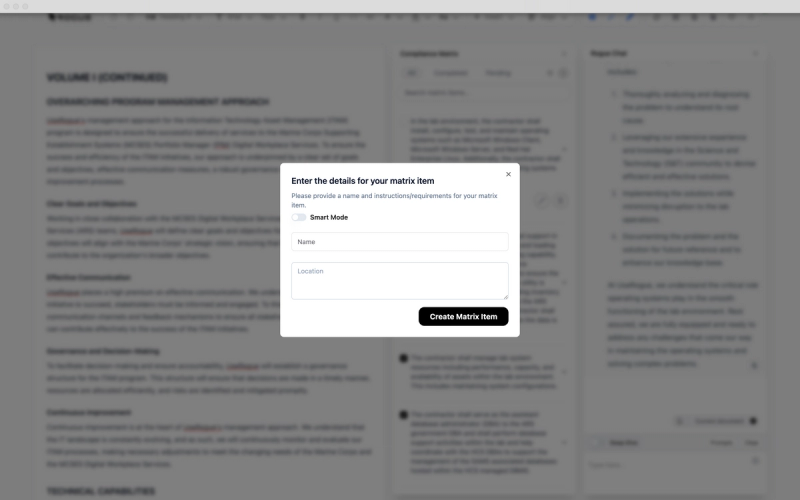
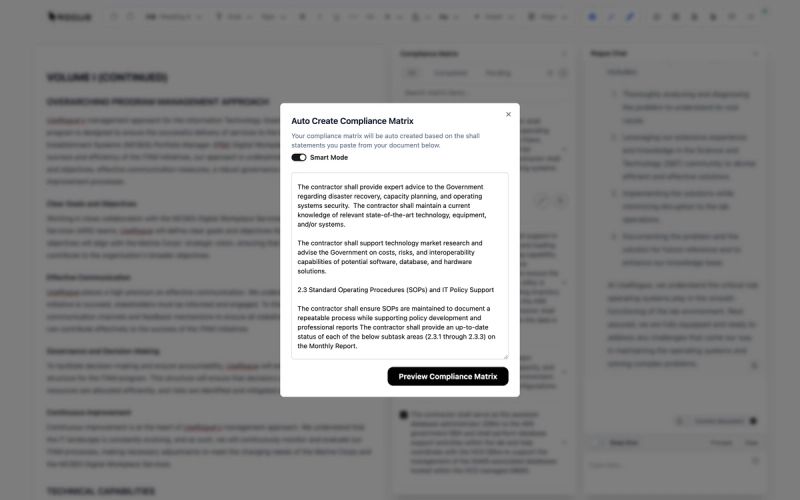
Or, if you toggle "Smart Mode" you can simply paste a section of shall, will, may statements directly from the solicitaiton and the AI will parse the relevant statements.
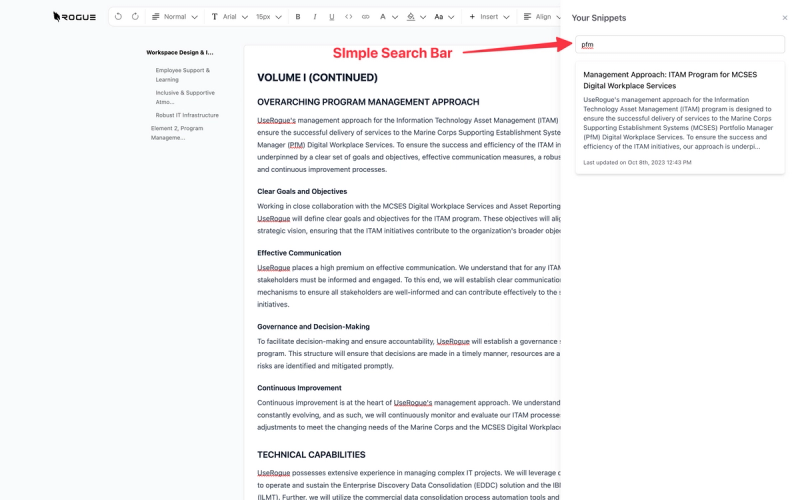
Snippets
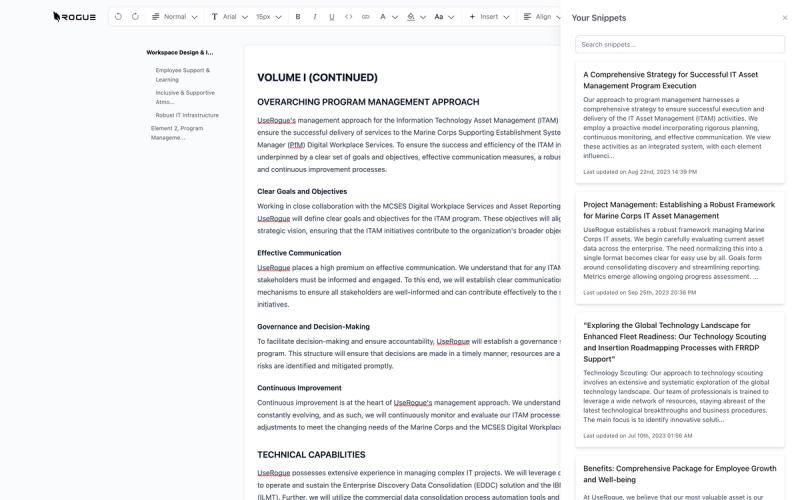
The chat interface and the other AI-powered tools are very potent in generating high-quality organic content. However, in the cases where you want to incorporate your best-in-breed verbiage, company standard content, or other structured content, we have the snippets bar.
Think of the snippets bar as a curated document library in the wirting work space. Selecting a snippet drops the content directly into the writing space where you left your cursor.
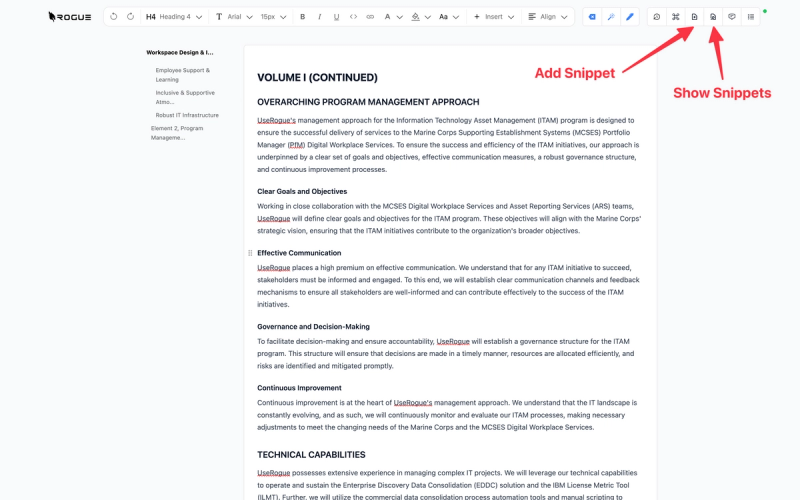
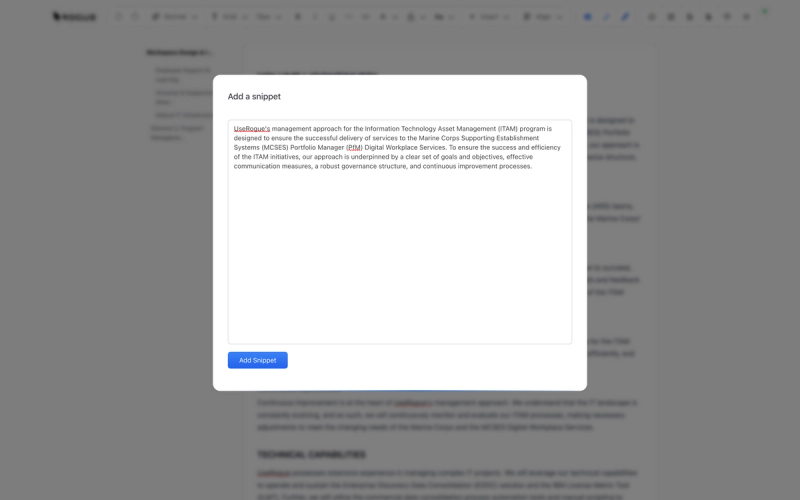
To add a snippet, simply paste the content into the "Add Snippet" screen and select "Add Snippet".
You can also use the search bar to find relevant content by key words or terms.